Adding Cash App Pay to Your Site
Cash App Pay is a fast and simple pay now payment method for your customers. Currently it is only available in the USA.
There are two ways customers can pay you with Cash App Pay:
These two payment flows are summarized below:
Shopping from a Desktop Device with a QR Code
-
From their desktop device, the customer selects Cash App Pay as the payment method during checkout.
-
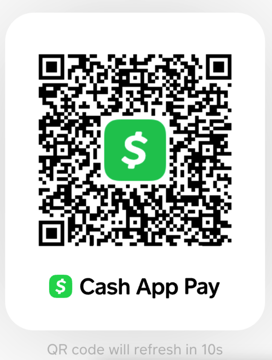
The customer holds their mobile device camera or Cash App’s QR scanner over the QR code that appears on the desktop screen to scan the QR code.
-
The customer follows the prompts on their mobile device to complete the transaction.
Shopping from a Mobile Device by Tapping
-
From their mobile device, the customer taps Cash App Pay to select it as the payment method during checkout.
-
The customer is redirected to Cash App, where they can follow the prompts to complete the transaction.
Remember that Cash App Pay is a pay now payment method. Customers use Cash App Pay to pay for goods and services in a single payment at the time of purchase.
Afterpay is a pay later payment method. Customers use Afterpay to pay for goods and services in several interest-free payments.
Appearance
If you implement Cash App Pay with Afterpay, expect the appearance of your checkout and payment pages to change slightly.
On checkout or other payment screens, Cash App Pay appears as a separate payment option alongside Afterpay. Cash App Pay is not within Afterpay, but provided alongside it. Customers with Cash App accounts can use their Cash App balance as a payment source to pay in installments.
Availability
It is important you are aware of Cash App Pay availability along with its related products:
-
Cash App Pay is only available in the USA
-
Cash App Pay on file is only available in the USA
Detailed Information
The following sections are on this page:
- Integrating Cash App payments using the existing Afterpay API
- Mobile Redirection
- Restarting Cash App Pay for a New Checkout Request
- Payment refunds with Cash App
- Settlement with Cash App
- Add Your Logo to the QR Code Scanner
- Advanced Rendering Control
Cash App Pay on file has a page of its own:
Integrating Cash App Payments Using the Existing Afterpay API
Disclaimer
To successfully launch the Cash App Pay screenflow on your website’s front-end, you must use the exact same JS script employed for launching the Afterpay screenflow.
For example, <script onload="initAfterPay()" src="https://portal.sandbox.afterpay.com/afterpay.js" async defer></script>
Accepting Cash App Pay payments uses the standard API for the Afterpay checkout process, with your existing Afterpay credentials. The Afterpay backend handles the transaction with Cash App Pay. The implementation process is as follows:
-
Call the Create Checkout API with the addition of the following parameter
isCashAppPay: trueto create an order token. -
Use the token in combination with the Standard Checkout flow, but call
AfterPay.initializeForCashAppPayinstead of Afterpay. like in the code sample below: -
Add a div with
id="cash-app-pay"where you want the Cash App Pay button to be rendered. -
On clicking the button the customer is shown a QR code (on desktop).
-
If the customer confirms the order, an Order Token, the customer’s Cashtag, and a SUCCESS status is returned. If the customer cancels the order, the Order Token and CANCELLED status are returned. We recommend that you display the Cashtag to the customer on the review or confirmation page. This is an example event object:
Cashtags are returned based on the environment
- Sandbox: The Afterpay Sandbox always returns the Cashtag:
$CASHTAG_C_TOKEN. - Production: In production, each customer’s actual Cashtag is returned.
- Depending on the payment flows you use for Afterpay, you follow the same process to complete an order. Either call Auth or Direct Capture. You receive an APPROVED or DECLINED status from Afterpay once the Auth or Direct Capture API has been completed.
Mobile Redirection
On Mobile, instead of a QR code, the customer is redirected to the Cash App. When the customer approves, they are returned to the URL specified in the redirectConfirmUrl in the Create Checkout call. This can be the same page where the Cash App Pay button is rendered e.g. example.com/checkout, or a new page for example, example.com/review
Query Params can be added to the redirectConfirmURL
If you want to determine if the page is loading as a result of redirect from the Cash App, you can add a query param to your redirectConfirmURL. e.g. example.com/checkout?cashapppay=true
The redirectCancelURL is not used by Cash App Pay
On mobile, the customer is always redirected to the redirectConfirmUrl for approved and declined flows.
The page the redirectConfirmUrl points to should initialize afterpay.js and define the below onComplete callback on page load:
Restarting Cash App Pay for a New Checkout Request
After checkout completion
After a successful checkout, the customer may visit another page, and then return to the checkout page to place an order without refreshing the page. Or in another scenario, you may want to provide an upsell immediately after the customer completes the checkout.
When you need to take a new order with Cash App Pay, you can call AfterPay.restartCashAppPay.
When restarted, AfterPay.js “forgets” all previous authorizations and previously charged amounts. It also removes all Cash App Pay UI (for example, the Cash App Pay button, QR code modal, or approved Cashtag).
We recommend that in a single page app, you call AfterPay.restartCashAppPay whenever the customer leaves the checkout page. When restarting at the exit of each page, if a customer comes back to the checkout page, your initialization flow works as normal. The customer never sees the QR code for a previous customer request.
Before checkout completion
In some cases, the payment button must be re-rendered and re-initialized without a successful checkout. For example, if a customer selects Cash App Pay, switches to a different payment method, and then re-selects Cash App Pay.
When a customer re-selects Cash App Pay, call AfterPay.renderCashAppPayButton to re-render the button. Next, restart Cash App Pay by calling AfterPay.restartCashAppPay.
Since the original checkout token is unused, you can use that token with AfterPay.initializeForCashAppPay(...).
Payment Refunds with Cash App
Cash App Pay purchase and refund flows follow the standard Afterpay payment refund and void processes.
However, if there is an error when refunding a Cash App pay order, additional information will be supplied in the payload. See the example code below to see this in action.
Example Code
You can find a complete list of Cash App Pay error codes here.
Settlement with Cash App
All payment resolution is handled by Afterpay. Your settlement information differentiates between Afterpay and Cash App sales.
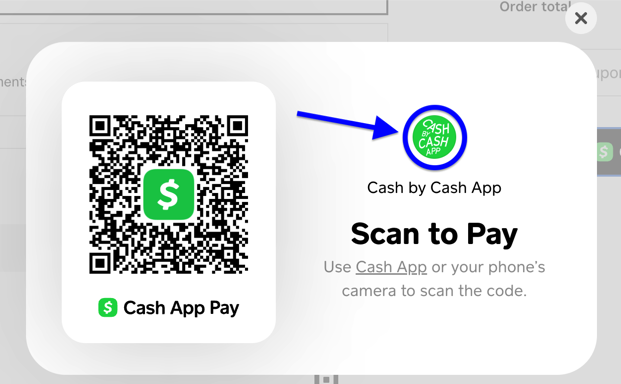
Add Your Logo to the QR Code Scanner
Add your company or organization’s logo to the QR code pop-up that appears during Cash App Pay checkout. You host this logo, send us its URL and we place it next to the QR code. See an example in the picture below:
To do this:
- Host your logo with its own URL. An appropriate logo must be:
-
At least 256 x 256 pixels in size
-
No larger than a 2MB file size
-
A square logo, because other shapes get distorted.
-
Produced with spacing/padding around the logo image, so that no part of the logo is cut-off when it is displayed
-
In a format of either .png, .jpg, or .jpeg
-
Contact your Afterpay sales contact or Afterpay merchant services representative and send them the logo URL.
-
We (Afterpay) will ensure your logo appears next to the Cash App Pay QR code.
A brand logo is not necessary for Cash App Pay to work, although the co-branding enhances the customer experience at checkout. Your brand logo is required to pass certification testing.
Advanced Rendering Control
As standard, we provide a fully managed and branded UI that includes a Cash App Pay button.
In some situations you may want advanced controls. For example, you may want to validate information a customer has given during checkout before the transaction continues. When AfterPay.renderCashAppPayButton is called, a begin method is returned through the onBegin callback for you to call when you’re ready.
Create Your Custom Button
You have two choices - to use JavaScript to create the custom button, or to use HTML direct.
JavaScript
HTML
The <cash-app-pay-logo> element renders a Cash App Pay logo. You can use this logo on your “choose a payment method page,” or to enhance your checkout button.
Initialize the Authorization Flow when Ready
You may want to use a specific button in your checkout experience for consistency across payment methods. When the manage option is false, you can also set the button option to false. This stops a Cash App Pay button from being rendered. You can now provide your own button and manage the authorization flow.
Troubleshooting
CSP - Content Security Policy
If you want to use Cash App Pay and have a CSP (Content Security Policy), please ensure that the CSP whitelists paykit’s pay.css file.
This whitelisting must apply equally to both the production and sandbox versions of Cash App Pay.